...because that's all I'm fit for at present. Rumours of relative normality were a bit of an exaggeration, and I've had several weeks of no activity at all. Mostly, that's been an energy thing, but the depression thing didn't want to be left out, so between them, I stopped working altogether. In an attempt to shake the depression at least, I fished out a piece of green nuno felt which, frankly, looked somewhat unprepossessing, to the point of making me wonder why I hadn't just tossed it out. A bit of stitch, using silk threads I got from Dale Rollerson at The Thread Studio in Australia, and had struggled to find a use for for some reason, made me change my mind somewhat.
I'd intended it to be a scarf, hence the shape and size, though in truth, it's not really long enough for that. Those threads were perfect for what I wanted to do, picking up the areas of darker green, and adding a bit more colour. Because this was a scarf, in intention at least, the shapes the dark green make are completely random, though one or two made me thing of Celtic motifs. Here's a closer look at a couple of them...
Not enough stitch, though...and things had ground to a halt over the weekend, as I couldn't find any threads that would be appropriate for the body of the scarf. Today, however, I found some cotton thread that, whilst not ideal, would have served. And then, I realised that there was a couple more silk threads which, whilst not identical in type, had been dyed with the same dyes... so I thought... that's better...
So...that's the plan for the rest of the week. Much as I'd like to blog more regularly, I'm afraid it's just not possible at present, until my energy levels improve. I will let you see the finished piece, though.
Monday, March 25, 2019
Tuesday, January 22, 2019
Relative Normality...
...has been resumed, for now, at least. A relapse, followed by Christmas, followed by an examination by a physiotherapist has left me unable to walk more than a few steps at a time, and gifted me a zimmer....sadly, the hospital will be wanting it back, so it can't be customised. So I haven't had the energy, until yesterday, to do any work at all.
I had looked out these small pieces of cloth before the relapse...and I do mean small: the largest is approx 4" by 2.5", the smallest, roughly 2.5" square. Yesterday, though, I combined them.
Yes, I know, they don't look like much : that's the whole point. I'm continuing the theme I started, exploring ME and its consequences. ME has systematically stripped me of the ability to work, has stripped colour and texture from my life, and these tiny pieces represent that. I have to work within those confinements: these pieces represent them. You probably can't see, but the base fabrics are not pure white. They are, in fact, pale prints, reversed, with pale prints, unreversed, held on the surface with random stitches, other than the central piece, which is a scrap of rust dyed silk. You can't tell with ME, how you are going to feel from day to day; these random stitches represent that idea, with the raw edges indicating that they have been torn from a larger cloth.
I intended to add them to a lutradur book, but when I got hold of a piece of lutradur, I liked them as a unified piece, so this is how they will stay.
I will, of course, iron the lutradur...that bump in the centre is not ideal... I'm not sure how I would frame them: perhaps sandwiched between two pieces of glass. I don't particularly want to put them on a coloured mount, and I think they might be lost on white board, though a double mount might do the trick. I'll have to think about it. They do look better in real life...but perhaps that's just wishful thinking.
I have another piece to work on, but that's it for today, no more energy. It's a start.
I had looked out these small pieces of cloth before the relapse...and I do mean small: the largest is approx 4" by 2.5", the smallest, roughly 2.5" square. Yesterday, though, I combined them.
Yes, I know, they don't look like much : that's the whole point. I'm continuing the theme I started, exploring ME and its consequences. ME has systematically stripped me of the ability to work, has stripped colour and texture from my life, and these tiny pieces represent that. I have to work within those confinements: these pieces represent them. You probably can't see, but the base fabrics are not pure white. They are, in fact, pale prints, reversed, with pale prints, unreversed, held on the surface with random stitches, other than the central piece, which is a scrap of rust dyed silk. You can't tell with ME, how you are going to feel from day to day; these random stitches represent that idea, with the raw edges indicating that they have been torn from a larger cloth.
I intended to add them to a lutradur book, but when I got hold of a piece of lutradur, I liked them as a unified piece, so this is how they will stay.
I will, of course, iron the lutradur...that bump in the centre is not ideal... I'm not sure how I would frame them: perhaps sandwiched between two pieces of glass. I don't particularly want to put them on a coloured mount, and I think they might be lost on white board, though a double mount might do the trick. I'll have to think about it. They do look better in real life...but perhaps that's just wishful thinking.
I have another piece to work on, but that's it for today, no more energy. It's a start.
Thursday, December 06, 2018
Nine Times....
...out of ten, there is no plan. Often, things go well...sometimes they don't. Today, I thought, shall work on the last of the fascinator bases I've been talking about... and couldn't find the damn thing. While I was hunting it in the studio (where it wasn't...), I came across a butterfly that said, you could combine me with the small silk flower you made just to see if it was too small...and the purple covered comb you made ages ago....
I can do that, thinks I. Overthinks, in fact; see the wire that the butterfly is on, has been attached to a needle, to allow me to thread it through the flower, because the wire wouldn't go through on its own... Well, it wouldn't go through on a needle either...but it did go straight through the heart of the flower. So far so good.
And then, gentle reader, it all went to hell in a handcart. Trying to attach the combination was beyond fiddly. And then this happened :
Note to self : Things that are made of feathers are not suitable for this sort of thing, altogether too delicate. Dammit. If you have to, then attach it at the end....more chance of it staying in one piece. Though in truth, if it breaks that easily, don't put it on a comb...it'll be safer on a hat. And really, I should have used glue; stitching the flower on to a sinamay covered comb is almost impossible. Trying to stitch on the top level only, without getting the thread caught in the tines of the comb would try the patience of a saint. Growl. So, what am I left with?
Pretty enough...but not worth the effort, I suspect. Sorry the photos are awful today, lousy light and not my usual camera...sigh. At least I finally found the missing fascinator base, and can proceed accordingly.
I can do that, thinks I. Overthinks, in fact; see the wire that the butterfly is on, has been attached to a needle, to allow me to thread it through the flower, because the wire wouldn't go through on its own... Well, it wouldn't go through on a needle either...but it did go straight through the heart of the flower. So far so good.
And then, gentle reader, it all went to hell in a handcart. Trying to attach the combination was beyond fiddly. And then this happened :
Note to self : Things that are made of feathers are not suitable for this sort of thing, altogether too delicate. Dammit. If you have to, then attach it at the end....more chance of it staying in one piece. Though in truth, if it breaks that easily, don't put it on a comb...it'll be safer on a hat. And really, I should have used glue; stitching the flower on to a sinamay covered comb is almost impossible. Trying to stitch on the top level only, without getting the thread caught in the tines of the comb would try the patience of a saint. Growl. So, what am I left with?
Pretty enough...but not worth the effort, I suspect. Sorry the photos are awful today, lousy light and not my usual camera...sigh. At least I finally found the missing fascinator base, and can proceed accordingly.
Monday, December 03, 2018
Next...
came the pink fascinator...here's what it looked like pinned to the block.
Not terribly prepossessing...and it doesn't look all that much better trimmed up and ready to wire...
Once that was done, and the binding was on...
...I thought...now what. Note the fading on the sinamay; nothing wrong with the fabric, just faded colour, so whatever I chose to do, had to cover that section, at least. I really didn't know what to do...and then, raking about in a box, found the daffodils I made a while ago, just to see if I could. Three of them made from lutradur, the trumpets heavily stitched. They went nicely with the pink tone of the hat, so I stitched them together...
...and then added them to the base...
...and now we're talking... this works really well. But just as I was putting things away, I came across a pale green piece of florist wrapping, very similar to lutradur, and thought it might be interesting to use it round the edge of the hat...
Looks better in real life... so I stuck it on my head, no mirror (too tired to get up and fiddle around...), and here's a rough idea of what it looks like...
The green edging has only been tacked on, but I think it gives you an idea of what it will look like once it's properly sewn on. I'm quite pleased with this; really must play with more lutradur flowers...and with lutradur in hat making in general... hmm..
Not terribly prepossessing...and it doesn't look all that much better trimmed up and ready to wire...
Once that was done, and the binding was on...
...I thought...now what. Note the fading on the sinamay; nothing wrong with the fabric, just faded colour, so whatever I chose to do, had to cover that section, at least. I really didn't know what to do...and then, raking about in a box, found the daffodils I made a while ago, just to see if I could. Three of them made from lutradur, the trumpets heavily stitched. They went nicely with the pink tone of the hat, so I stitched them together...
...and then added them to the base...
...and now we're talking... this works really well. But just as I was putting things away, I came across a pale green piece of florist wrapping, very similar to lutradur, and thought it might be interesting to use it round the edge of the hat...
Looks better in real life... so I stuck it on my head, no mirror (too tired to get up and fiddle around...), and here's a rough idea of what it looks like...
The green edging has only been tacked on, but I think it gives you an idea of what it will look like once it's properly sewn on. I'm quite pleased with this; really must play with more lutradur flowers...and with lutradur in hat making in general... hmm..
Labels:
daffodil,
fascinator,
hand stitch,
hat,
lutradur,
sinamay
Saturday, December 01, 2018
Decoration...
...is the real art of the fascinator. Here's what it looks like now.
That's a silk organza rose, made from my hand dyed cloth, cut on the bias (yes, the b word again...seems to crop up frequently in millinery, doesn't it?). Hand stitched, and then hand stitched onto the base. Five feathers, a similar colour to the base (champagne, it's called), glued and stitched on. I've tried adding some hand stitched feathers to that base, but it seems rather cluttered when I do, so I suspect it'll stay as it is. Now that it has some decoration on it, it doesn't seem quite so large; the proof of that will be when it's actually worn, of course.
There are three options for wearing it. I could put a comb on it, so that it sits on the head that way. I think it's too large for that, and besides, I don't like combs in general, except as a basis for tiny little headpieces. I could also put it on a headband, which I would cover with bias, like this...
That's a silk organza rose, made from my hand dyed cloth, cut on the bias (yes, the b word again...seems to crop up frequently in millinery, doesn't it?). Hand stitched, and then hand stitched onto the base. Five feathers, a similar colour to the base (champagne, it's called), glued and stitched on. I've tried adding some hand stitched feathers to that base, but it seems rather cluttered when I do, so I suspect it'll stay as it is. Now that it has some decoration on it, it doesn't seem quite so large; the proof of that will be when it's actually worn, of course.
There are three options for wearing it. I could put a comb on it, so that it sits on the head that way. I think it's too large for that, and besides, I don't like combs in general, except as a basis for tiny little headpieces. I could also put it on a headband, which I would cover with bias, like this...
There is a remarkable amount of hand stitch involved in millinery, and this is no different. But it doesn't really suit the way I envisage it sitting on the head, so it'll need to be the third option, a very narrow elastic band that hides under the hair, and holds the piece in place. Now all I have to do is work out where the one or two bands I have left are hiding, and attach them. It'll not be today, though.... but I promise to show you how it ends up.
Friday, November 30, 2018
Progress...
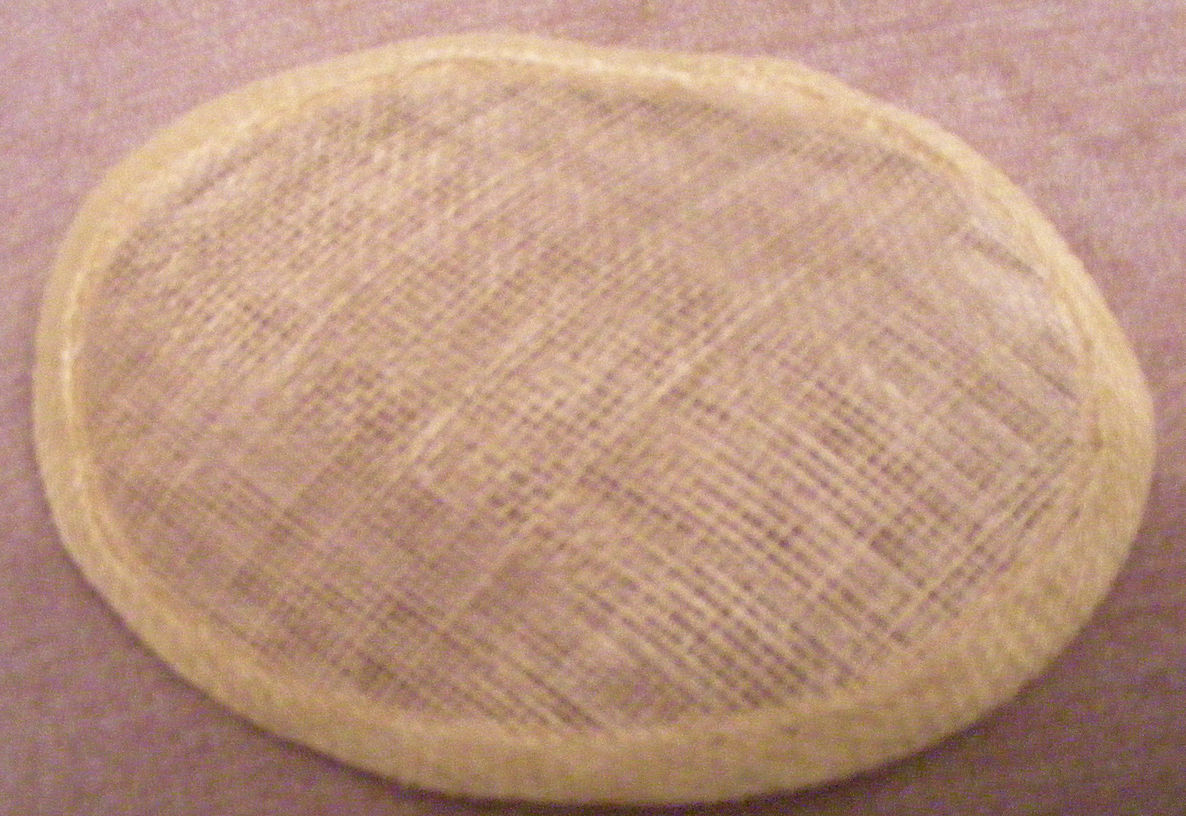
...with one fascinator, anyway, the cream one. I marked the shape I wanted to achieve, using an oval box which I use to keep my millinery pins in, while it was still on the dolly, and then removed it. On the table, it looks pretty unprepossessing, but you can see the distinct curve that has been produced by drying the flat fabric on the dolly.
Trimmed down, though, it starts to take shape.
I'm concerned that I've made it too big, and that concern is continuing throughout the process, so a lesson learned, I guess...but given that this one is the first I've made in several years, I'll be happy if that's the only serious mistake I make.
The next step is wiring, so that it retains its shape, and then the edges are covered in bias binding. I won't tell you how long all that took... bias binding is a pig to work with, regardless of what type of fabric you use.
And now, it's a bona fide fascinator base, all ready to be decorated. Looking at it on the dolly, I do think it's too big, but, as Robin said when I said that to him, fascinators are really all about the decoration...so we'll see. But I've got lots of decisions to make before it's finished....how to decorate it, how to make it stay on the head (millinery pins are fine for wood, but not so good for humans...)...but for now, that's it... and I'm pleased to have got this far. More tomorrow.
Trimmed down, though, it starts to take shape.
I'm concerned that I've made it too big, and that concern is continuing throughout the process, so a lesson learned, I guess...but given that this one is the first I've made in several years, I'll be happy if that's the only serious mistake I make.
The next step is wiring, so that it retains its shape, and then the edges are covered in bias binding. I won't tell you how long all that took... bias binding is a pig to work with, regardless of what type of fabric you use.
And now, it's a bona fide fascinator base, all ready to be decorated. Looking at it on the dolly, I do think it's too big, but, as Robin said when I said that to him, fascinators are really all about the decoration...so we'll see. But I've got lots of decisions to make before it's finished....how to decorate it, how to make it stay on the head (millinery pins are fine for wood, but not so good for humans...)...but for now, that's it... and I'm pleased to have got this far. More tomorrow.
Wednesday, November 28, 2018
Going Bananas...
over sinamay... well, it is made from abaca fibres, after all. I've now got three bits of pink sinamay bias. I'd forgotten how scratchy this part of the process is. I can usually give you some sort of comparison, to put it into context, but there's nothing equivalent. Imagine working with very stiff hessian, perhaps. It does what it's told...eventually...but its edges are not pleasant to work with. And it gets caught on your clothes, sigh. The image gives you an idea of what you get from a cut strip of this size. If you think it's narrower than you would expect from 'normal' fabric, you'd be right; once it's folded, you tug it slightly, which makes it longer and thinner, easier to work with.
I had three pieces cut, well, six in all, because sinamay is used doubled or even tripled, to make three pieces. The key words for this are stretch and smooth...you'll see why as the process progresses. To make fascinator bases, the sinamay is stretched flat on the dolly, working to get it as smooth as possible against the curves of the block...
As with all fabric, it is stretched across the diagonals, first, and then more pins are added...and taken out...and re-added... to get as smooth a result as you can manage. Working with 3 dimensions, as you do with normal hat blocks, uses the same principle, but is even more fiddly...again, starts with the diagonals, and then additional pins are added.
You can see from this image how fiddly this is... the fabric is being stretched on a curve, so pretty much every time you add another pin, there's more excess fabric to be stretched out. Eventually, you get to this...
Not perfect, but good enough for practice. Here's the upshot of my morning's work...
These have to dry, first, then I'll decide what shapes to make the respective fascinators (probably a circle and a tear drop shape), and draw that lightly onto the top layer in pencil, before taking them off the dolly and wiring them. The other shape will be removed from the block and wired.
That lot took about an hour, my limit, really... so now for a bit of a rest... It does feel like going back to square one, in many ways, but at least I can remember what to do... and I have books for reference.
I had three pieces cut, well, six in all, because sinamay is used doubled or even tripled, to make three pieces. The key words for this are stretch and smooth...you'll see why as the process progresses. To make fascinator bases, the sinamay is stretched flat on the dolly, working to get it as smooth as possible against the curves of the block...
As with all fabric, it is stretched across the diagonals, first, and then more pins are added...and taken out...and re-added... to get as smooth a result as you can manage. Working with 3 dimensions, as you do with normal hat blocks, uses the same principle, but is even more fiddly...again, starts with the diagonals, and then additional pins are added.
You can see from this image how fiddly this is... the fabric is being stretched on a curve, so pretty much every time you add another pin, there's more excess fabric to be stretched out. Eventually, you get to this...
Not perfect, but good enough for practice. Here's the upshot of my morning's work...
These have to dry, first, then I'll decide what shapes to make the respective fascinators (probably a circle and a tear drop shape), and draw that lightly onto the top layer in pencil, before taking them off the dolly and wiring them. The other shape will be removed from the block and wired.
That lot took about an hour, my limit, really... so now for a bit of a rest... It does feel like going back to square one, in many ways, but at least I can remember what to do... and I have books for reference.
Labels:
bias binding.,
fascinator,
hat,
hats,
millinery,
sinamay
Tuesday, November 27, 2018
Getting Back To Hats...
seems like a good idea. They're relatively small, albeit a tad fiddly, I can pick 'em up and put 'em down as the energy dictates, and they're useful. What's not to like? Besides, I can use a fair range of the textile skills I have on them, and explore working in 3D, while I'm at it. So, I ordered some of this stuff, cotton covered millinery wire, and it arrived yesterday; it's fine, but not too fine, infinitely flexible and relatively easy to work with.
.
I have a fair amount of sinamay already, so I don't have to spend a great deal...except...I really want a brim block, so I can use the larger blocks I already have...but we'll see how we get on with the blocks I have. Besides, I can't make up my mind what kind of brim to buy...I don't have infinite resources, and I need to get something useful. Decisions, decisions. I'm going to stick to fascinators for now.
I decided to work with some of my existing offcuts, which have been sitting in a box for I Hate To Think How Long... there's some white bias already cut and shaped, so I cut a couple of squares for fair sized fascinator bases in white, and a couple in pink. One of them will be pinned over this block (which I think actually belongs to my friend Clare...sorry, dear heart...). The other will go onto Dolly, to give it some shape... a dolly is a head shaped block on a stand, which I use to shape things, but also to see how a hat looks as I add things to it....just in case you were wondering.
The block is covered with clingfilm to protect the wood, in case you were wondering. And as I'll need some pink bias, I started cutting it... I'll probably discard the discoloured areas ... sinamay fades in the sun, clearly.
Bias is used a lot to create embellishments for hats, as well as simply binding the edges; fortunately, sinamay is much easier to handle than, say, silk. I need to make some embellishments for this little comb I found in a box... I covered it who knows how long ago, it would be fun to put a flower or a swirl of sinamay on it, to make it interesting...
I have a lot of combs like this one; I'm planning to cover them and give them to a local charity to raise funds, if I can find one who would be interested. Sophisticated ones for grown ups, and cute for kids...should be fun. I've made grown up ones before, modeled by my friend Gemma, again, a very long time ago...see the post herehttps://artmixter.blogspot.com/2012/02/snapping-up-storm.html.
Mostly, though, I'll be doing this for the joy of it... hurrah.
.
I have a fair amount of sinamay already, so I don't have to spend a great deal...except...I really want a brim block, so I can use the larger blocks I already have...but we'll see how we get on with the blocks I have. Besides, I can't make up my mind what kind of brim to buy...I don't have infinite resources, and I need to get something useful. Decisions, decisions. I'm going to stick to fascinators for now.
I decided to work with some of my existing offcuts, which have been sitting in a box for I Hate To Think How Long... there's some white bias already cut and shaped, so I cut a couple of squares for fair sized fascinator bases in white, and a couple in pink. One of them will be pinned over this block (which I think actually belongs to my friend Clare...sorry, dear heart...). The other will go onto Dolly, to give it some shape... a dolly is a head shaped block on a stand, which I use to shape things, but also to see how a hat looks as I add things to it....just in case you were wondering.
The block is covered with clingfilm to protect the wood, in case you were wondering. And as I'll need some pink bias, I started cutting it... I'll probably discard the discoloured areas ... sinamay fades in the sun, clearly.
Bias is used a lot to create embellishments for hats, as well as simply binding the edges; fortunately, sinamay is much easier to handle than, say, silk. I need to make some embellishments for this little comb I found in a box... I covered it who knows how long ago, it would be fun to put a flower or a swirl of sinamay on it, to make it interesting...
I have a lot of combs like this one; I'm planning to cover them and give them to a local charity to raise funds, if I can find one who would be interested. Sophisticated ones for grown ups, and cute for kids...should be fun. I've made grown up ones before, modeled by my friend Gemma, again, a very long time ago...see the post herehttps://artmixter.blogspot.com/2012/02/snapping-up-storm.html.
Mostly, though, I'll be doing this for the joy of it... hurrah.
Labels:
bias binding,
dolly,
fascinator,
hats,
millinery,
sinamay
Saturday, November 24, 2018
Unpicking Stitch...
...isn't something I do routinely. Partly, that's because of the way I use stitch... I tend to use layers of stitch, so one wee blip doesn't cause me to unpick a line of stitching. Partly, I'm fairly flexible; I don't usually have something specific in mind, so the word 'wrong' doesn't really figure in my artistic vocabulary. So it takes something seriously 'wrong' to make me unpick. This, though, ticked all the boxes.
It started with one of Cara's paintings, this one, to be precise.
I like this one. I think it's to do with the amount of space there is between the elements. Space intrigues me... so I did a couple of versions of my own, to see if I could work out what it was I liked about it.
My version is pared back even further. It has the feeling of a landscape....a Norfolk landscape, all sky and flatness. And at that point, I thought, textile. And transparent cloth. And that's when it started going to hell in a handcart. Because my selection of transparent cloth is fairly limited...so I went with what I had. The top section of this is great...the bottom...bleh...
Meet Blue Moon. The top is a small piece of hand dyed silk organza, and that works pretty well. The bottom is also hand dyed silk, and looked okay before I applied it, when there was light coming through it....but it's just Too Dark. The piece of ribbon and the stitch I added doesn't help, nor did the light coloured ribbon, or the silver paint I daubed it with, in the hope of making it just a bit lighter...sigh.
So that's what I'm unpicking. I have absolutely no idea what I'll add in its place, but I do know it mustn't be dark. I think I might hand paint some silk organza to use; I may not have that much of a selection of finished cloth, but I do have some silk for dyeing. And we'll see how that goes. Sadly, I can't remove the silver paint from the white cloth, so that, too needs to be thought through. I also suspect that the square format it's in isn't doing it any favours; it messes up the balance of the two elements... plenty of space, but in the wrong places (yes, it's a napkin...I use them for sketches). It's a sketch; that's what it's for, of course, but I don't usually misjudge quite so badly. Hey ho...onwards and upwards...
It started with one of Cara's paintings, this one, to be precise.
I like this one. I think it's to do with the amount of space there is between the elements. Space intrigues me... so I did a couple of versions of my own, to see if I could work out what it was I liked about it.
My version is pared back even further. It has the feeling of a landscape....a Norfolk landscape, all sky and flatness. And at that point, I thought, textile. And transparent cloth. And that's when it started going to hell in a handcart. Because my selection of transparent cloth is fairly limited...so I went with what I had. The top section of this is great...the bottom...bleh...
Meet Blue Moon. The top is a small piece of hand dyed silk organza, and that works pretty well. The bottom is also hand dyed silk, and looked okay before I applied it, when there was light coming through it....but it's just Too Dark. The piece of ribbon and the stitch I added doesn't help, nor did the light coloured ribbon, or the silver paint I daubed it with, in the hope of making it just a bit lighter...sigh.
So that's what I'm unpicking. I have absolutely no idea what I'll add in its place, but I do know it mustn't be dark. I think I might hand paint some silk organza to use; I may not have that much of a selection of finished cloth, but I do have some silk for dyeing. And we'll see how that goes. Sadly, I can't remove the silver paint from the white cloth, so that, too needs to be thought through. I also suspect that the square format it's in isn't doing it any favours; it messes up the balance of the two elements... plenty of space, but in the wrong places (yes, it's a napkin...I use them for sketches). It's a sketch; that's what it's for, of course, but I don't usually misjudge quite so badly. Hey ho...onwards and upwards...
Friday, November 23, 2018
Back To Work...
...after a couple of difficult weeks. Remember the watercolour book? Well...because I had coloured the reverse of that with transfer dyes, I was able to create another, similar book...
This time, I've stitched the coloured side with normal weight thread, while the reverse has the heavier, Decora thread. You can just pick up the stitching, I think...it's not particularly intense, by my standards. I find the individual pages interesting; here they are as individuals, to let you see clearly how each of them stands alone as a landscape...landscapes within landscapes, if you like.
I suspect I'll add quite a bit more stitch, but this is all I could manage today. I haven't taken pictures of the reverse, which, of course, is white with stitch. I haven't yet decided what to do with it. Paint is an option, of course, but so are applique and collage. Plus, I could add significantly more stitch, obviating the need to add more colour (I think...).
I think the title of this might be 'Red Sky At Night', because the rhyme keeps running through my head...but we'll have to see. Things might change as the piece progresses. They usually do.
This time, I've stitched the coloured side with normal weight thread, while the reverse has the heavier, Decora thread. You can just pick up the stitching, I think...it's not particularly intense, by my standards. I find the individual pages interesting; here they are as individuals, to let you see clearly how each of them stands alone as a landscape...landscapes within landscapes, if you like.
I suspect I'll add quite a bit more stitch, but this is all I could manage today. I haven't taken pictures of the reverse, which, of course, is white with stitch. I haven't yet decided what to do with it. Paint is an option, of course, but so are applique and collage. Plus, I could add significantly more stitch, obviating the need to add more colour (I think...).
I think the title of this might be 'Red Sky At Night', because the rhyme keeps running through my head...but we'll have to see. Things might change as the piece progresses. They usually do.
Saturday, November 10, 2018
Another One Bites The Dust...
another hand made book, that is (hands up everyone who now has Freddie Mercury's dulcet tones in their ears...?). Here is the reverse side of the purple watercolour landscape book, finally finished.
As a comparison, here's the front...
They're similar, but by no means identical. If you look closely, you'll see the stitching on both sides. Of course, the reverse side doesn't have the heavier thread, but it doesn't seem to have lost anything as a result. I'd like to say it was carefully designed to fit the stitch...but it wasn't... I'm pleased with it. Will I add text? Possibly. I need to think about it, look at the piece for a while, see what suggests itself. Writing, for me, is just the same as art making...it's fairly spontaneous, but also fairly focused.
As you'll recall, the colour for the reverse side was transfer dye, and that means that I could get a minimum of three, and up to five (if I'm lucky) prints from the same piece of painted paper. So I happened to have another piece of Lutradur XL cut and ready to make into a book, so it seemed reasonable to turn that into another purple landscape piece.
The colours here are more intense; that's because I ironed them on longer. The amount of pressure and the length of time you iron a piece will affect the intensity of the colour transferred on the cloth. I deliberately made the first of the transferred images relatively light, to reflect the tones on the painted side of the book, but this one, I wanted to be stronger. I contemplated simply ironing onto the reverse, but decided that I was too tired, and that it would be much more interesting to add paint on the reverse, so that's for another day. Two for the price of one...always a good deal. Well, okay, one and a half...but who's counting...
As a comparison, here's the front...
They're similar, but by no means identical. If you look closely, you'll see the stitching on both sides. Of course, the reverse side doesn't have the heavier thread, but it doesn't seem to have lost anything as a result. I'd like to say it was carefully designed to fit the stitch...but it wasn't... I'm pleased with it. Will I add text? Possibly. I need to think about it, look at the piece for a while, see what suggests itself. Writing, for me, is just the same as art making...it's fairly spontaneous, but also fairly focused.
As you'll recall, the colour for the reverse side was transfer dye, and that means that I could get a minimum of three, and up to five (if I'm lucky) prints from the same piece of painted paper. So I happened to have another piece of Lutradur XL cut and ready to make into a book, so it seemed reasonable to turn that into another purple landscape piece.
The colours here are more intense; that's because I ironed them on longer. The amount of pressure and the length of time you iron a piece will affect the intensity of the colour transferred on the cloth. I deliberately made the first of the transferred images relatively light, to reflect the tones on the painted side of the book, but this one, I wanted to be stronger. I contemplated simply ironing onto the reverse, but decided that I was too tired, and that it would be much more interesting to add paint on the reverse, so that's for another day. Two for the price of one...always a good deal. Well, okay, one and a half...but who's counting...
Friday, November 09, 2018
It's Amazing...
...how much more energy I have if I don't fiddle about with a computer... Someone cut a BT cable during some work, plunging Bo'ness and Linlithgow into internet darkness for a day and a bit. So...I started to develop some new work (of which more anon) and existing work, namely the watercolour landscape I spoke of last time .
I started by folding the book, so that I could see how each 'page' worked. As it turned out, it also made the piece easier to handle with the sewing machine, as I could fold and unfold as I went along. I'm happy enough with the colour and structure ... now, it needed stitch.
I started with some variegated cotton, in purples: it doesn't show up all that well in the main image, but you can see it nicely in the detail.
I wanted some sort of contrast, some heavier thread, so raked out some Madeira Decora, which I put in the bobbin. I haven't used it in a very long time, and struggled with it, somewhat...but decided to leave some of the catches in the stitching as they were, added texture ( she said firmly)...
Not necessarily a good decision...but I don't want to run the risk of redoing the stitch, and missing the original holes... so it's going to stay as it is. So, as I say, not necessarily a good decision, but the best I can make in the circumstances. I've kept it very, very simple. I don't feel the need to add more stitch. I had contemplated adding some applique...but I think that would be overkill. A poem, perhaps, but no more visual imagery, I think there's enough going on as it is. It's interesting to swap between the individual landscapes, as designated by the folds that make up the pages, and the entire landscape, across them all. Anything else would be distracting.
Being a book, of course, this isn't the only side that's important. The reverse needs to have treatment, too... Some of the watercolour has leaked through, so the choice of colour is already made for me.
Why? Because whatever I add, the watercolour would mix with it. And, on reflection, I don't want the colour on the other side to shift at all...so I need to add dry colour, rather than wet. That rules out conventional paint of any kind. I could fuse on fabric, but then I would lose the stitch, and I want to retain that. So... I painted up a piece of paper with transfer dyes in these colours. That monoprint I showed you was on a large piece of paper, and there was enough room on it to colour a piece for dye transfer, so that I was sure that it was both deep and wide enough to cover the entire strip.
So far so good... now all I have to do is iron on the colour...
This wasn't the only piece I worked on yesterday... I went on and painted more paper, as I had the paints out anyway... printed with some bubblewrap... and I designed and stitched another piece... and then had to lie down... but hey, I had fun. More anon.
I started by folding the book, so that I could see how each 'page' worked. As it turned out, it also made the piece easier to handle with the sewing machine, as I could fold and unfold as I went along. I'm happy enough with the colour and structure ... now, it needed stitch.
I started with some variegated cotton, in purples: it doesn't show up all that well in the main image, but you can see it nicely in the detail.
I wanted some sort of contrast, some heavier thread, so raked out some Madeira Decora, which I put in the bobbin. I haven't used it in a very long time, and struggled with it, somewhat...but decided to leave some of the catches in the stitching as they were, added texture ( she said firmly)...
Not necessarily a good decision...but I don't want to run the risk of redoing the stitch, and missing the original holes... so it's going to stay as it is. So, as I say, not necessarily a good decision, but the best I can make in the circumstances. I've kept it very, very simple. I don't feel the need to add more stitch. I had contemplated adding some applique...but I think that would be overkill. A poem, perhaps, but no more visual imagery, I think there's enough going on as it is. It's interesting to swap between the individual landscapes, as designated by the folds that make up the pages, and the entire landscape, across them all. Anything else would be distracting.
Being a book, of course, this isn't the only side that's important. The reverse needs to have treatment, too... Some of the watercolour has leaked through, so the choice of colour is already made for me.
Why? Because whatever I add, the watercolour would mix with it. And, on reflection, I don't want the colour on the other side to shift at all...so I need to add dry colour, rather than wet. That rules out conventional paint of any kind. I could fuse on fabric, but then I would lose the stitch, and I want to retain that. So... I painted up a piece of paper with transfer dyes in these colours. That monoprint I showed you was on a large piece of paper, and there was enough room on it to colour a piece for dye transfer, so that I was sure that it was both deep and wide enough to cover the entire strip.
So far so good... now all I have to do is iron on the colour...
This wasn't the only piece I worked on yesterday... I went on and painted more paper, as I had the paints out anyway... printed with some bubblewrap... and I designed and stitched another piece... and then had to lie down... but hey, I had fun. More anon.
Subscribe to:
Posts (Atom)